OK you guessed it, we are not covering mountain ranges here (i.e. if you saw the post image on our front page) – in this post we will cover the Range programming block used within the Lego MINDSTORMS EV3 programming software. We will cover all the available options and also provide a step by step example program.
What is the EV3 Range Block?
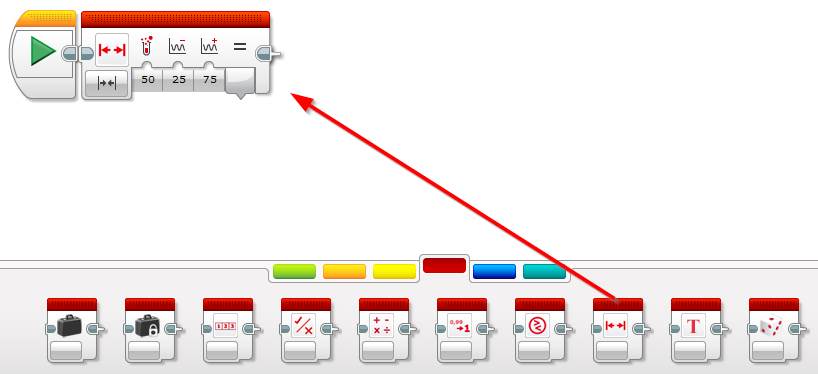
The Range block checks to see if a single number (i.e. the Test Value) falls either in between or outside of a numeric range.
The example below will test if 50 is in between 25 and 75, in this case it will output True.
What are the Range Block Modes?
The Range programming block has 2 modes:
Inside
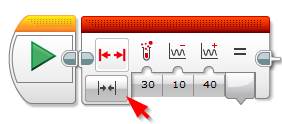
The Range block’s inside mode will return True if the Test Value falls inside of the specified range. For example 30 is inside of a range of 10 and 40:
Outside
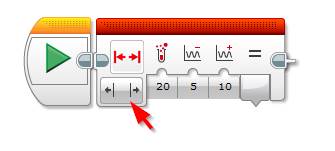
The Range block’s outside mode will return True if the Test Value falls outside of the specified range. For Example 20 is outside of a range of 5 and 10:
How to Use the Range Block
The Range block consists of 3 numeric inputs:
- Test Value: The number to check to see if it’s inside or outside the range.
- Lower Bound: the lowest number in the range
- Upper Bound: the highest number in the range
The test value can be either hard coded at the time of writing the program or it can be wired in from another block, this block could be anything that outputs a numeric value – for example a numeric variable or sensor. This is also true for the lower and upper bound values, they can be hard coded or wired in from any block that outputs a number.
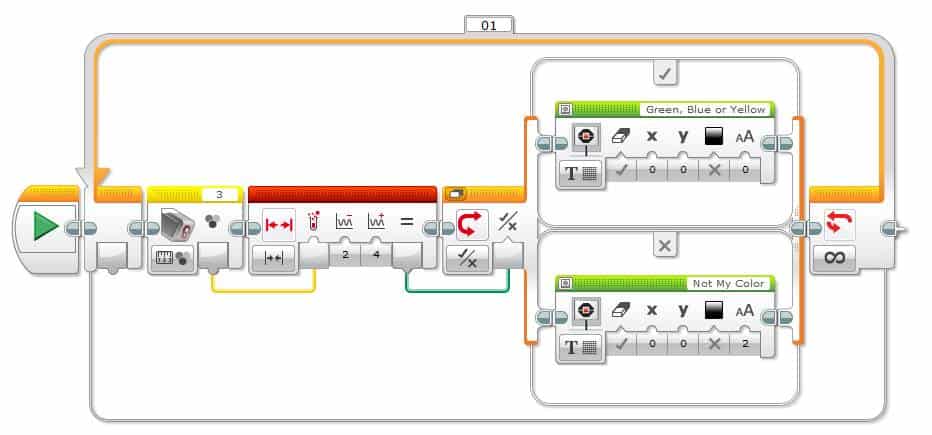
The example blow shows how to use an EV3 Range programming block to check the output of the color sensor to see if it’s green, blue or yellow. If it is, it will output it to the EV3 Brick Display.
Does the EV3 Range Block Support Decimals?
Yes, the EV3 Range block does support decimals. It supports up to 5 decimals in each input number (Test Value, Lower Bound and Upper Bound).
EV3 Compare Range Block Example Program: Light Detector
In this example program we’ll take you through creating an EV3 program which will using the Range block and the Color sensor to detect light. If detected the robot will say “Detected” and if light is not detected it will make a sonar noise to indicate that it’s looking.
The Color sensor’s ambient light intensity mode will output a value of 0 (very dark) to 100 (very light).
Program Logic:
- Use the Lego EV3 Color sensor to measure the ambient light intensity.
- If it’s between 80 and 100 (very light) then say the word “Detected”
- If it’s outside of 80 and 100 (i.e. below 80), then make a sonar sound.
- Loop the logic
If you are unfamiliar with the Lego EV3 Color Sensor programming block, please see our full post here which covers all of its available modes.
Lets get started:
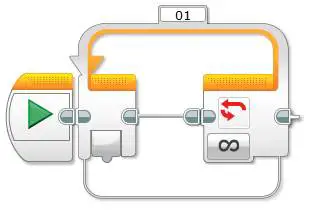
- Loop the program
- Drag and drop an orange Loop block next to the start button
- Leave its mode as unlimited
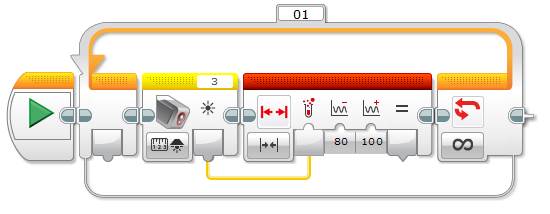
- Detect the ambient light and check the output’s range to see if it’s between 80 and 100.
- Drag and drop an yellow Color Sensor block inside of the Loop
- Set its mode to Measure Ambient Light Intensity
- Drag and drop a red Compare block next to the Color sensor block
- Wire the Color sensor output into the Test Value of the compare block
- Set the Lower Bound value to 80
- Set the Upper Bound value to 100
- Ensure the mode is set to Inside
- Drag and drop an yellow Color Sensor block inside of the Loop
- Play either the sonar sound or the word “Detected” if light is found
- Drag and drop an orange Switch block next to the Range block
- Set its mode to Logic
- Drag and drop a green Sound block into the True case of the Switch block
- Set its File Name to Information | Detected
- Drag and drop a green Sound block into the False case of the Switch block
- Set its File Name to Mechanical| Sonar
- Drag and drop an orange Switch block next to the Range block
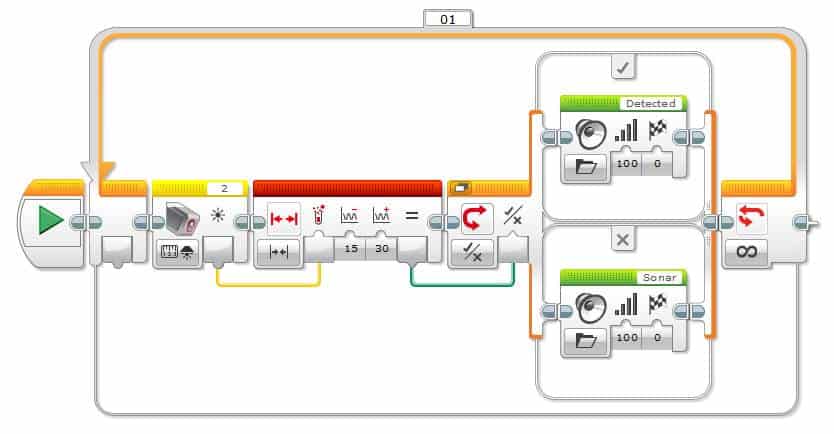
That’s it, hit the download and play button to test your program.
We hope you enjoyed this deep dive post into the Lego MINDSTORMS EV3 Range programming block. Feel free to leave a comment if you have any questions or have a suggestion for a future post.
Post Photo by Ales Krivec on Unsplash

