In this post we will cover the Text block (sometimes called the Text Merge block) used within the Lego MINDSTORMS EV3 programming software. As well as explaining this block we will include 2 step by step example programs.
What is the Text Block?
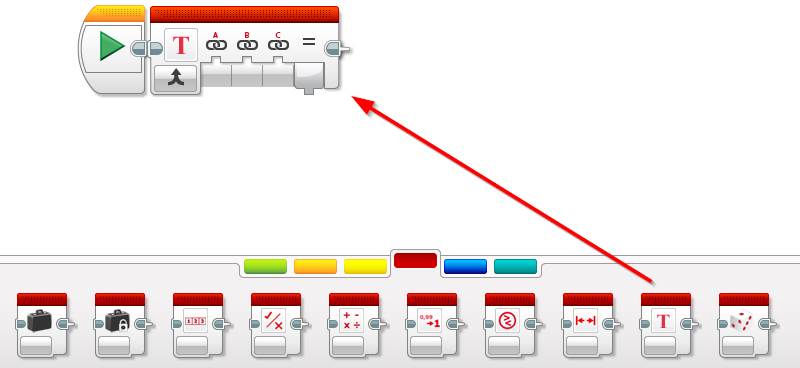
The Lego MINDSTORMS EV3 Text block is used to merge up to 3 text inputs into a single output for displaying on the EV3 Brick screen (or saving into a text based variable). It is available from the red data operations palette:

Note: the Text block cannot split text into multiple lines, in order to do this we need multiple Display blocks – see Example 2 program later in this post for more detail.
What Modes does the Text Block Support?
The Text block supports only one mode which is merge.
How to use the Text Block
The Text block takes the input strings named A, B and C and combines them together into a single string. The order of the string will also follow the A, B, and C sequence.
In order to use the block we must wire the result output into another block. The example below will output the text “Merge this text” for 2 seconds on the EV3 Brick display:

One thing to keep in mind is spaces, the Text block will not automatically insert spaces into the merged string. In the example above I needed to place a space at the start of ” this” and ” text” in order for it to output properly.
Note: If an input is empty it will be skipped. In the example below the text output will be “This is a test”
A = This
B =
C = is a text
EV3 Text Block Example Program 1: Merge Sensor Data
In the first example program we will take a reading from the color sensor and, convert it to a word (red, blue, black etc) and merge the output with a message detailing the color on the EV3 Brick display.
This program requires no build, just the Lego MINDSTORMS EV3 brick and the color sensor connected to port 3.
Program Logic:
- Count down from 3 to give the user time to place the color sensor.
- Measure the color
- Convert the measurement (a number) into a word
- Display a message on the screen detailing the detected color.
Lets get started:
- Count down from 3:
- Drag and drop a green Sound block next to the Start block
- Select the file LEGO Sound Files | Numbers | Three
- Drag and drop a green Sound block
- Select the file LEGO Sound Files | Numbers | Two
- Drag and drop a green Sound block
- Select the file LEGO Sound Files | Numbers | One
- Drag and drop a green Sound block next to the Start block

- Detect the color using the color sensor and write the color value to a variable:
- Drag and drop an orange Switch block after the last sound block
- Set its mode to Color Sensor | Measure | Color
- Set the view a a tabbed view (when dealing with a lot of options I prefer this view – more information on this can be found in here in our Switch Block post.
- Write the color name into a variable:
- Drag and drop a red Variable block into the black case option of the switch block
- Set its mode to Write | Text
- In the variable name select Add Variable
- Set the variable name to ColorName and click OK
- In the Value input type Black
- Drag and drop a red Variable block into the “No Color” case option of the switch block
- Set its mode to Write | Text
- Ensure the ColorName variable is selected
- In the Value input type No Color
- Add a new Case option to the switch block and select Blue
- Drag and drop a red Variable block into the Blue case option of the switch block
- Set its mode to Write | Text
- Ensure the ColorName variable is selected
- In the Value input type Blue
- Drag and drop a red Variable block into the Blue case option of the switch block
- Add a new Case option to the switch block and select Green
- Drag and drop a red Variable block into the Green case option of the switch block
- Set its mode to Write | Text
- Ensure the ColorName variable is selected
- In the Value input type Green
- Drag and drop a red Variable block into the Green case option of the switch block
- Repeat this process for the remaining colors:
- Yellow
- Red
- White
- Brown
- Drag and drop a red Variable block into the black case option of the switch block
- Set the No Color case as the default (i.e. select the radio button on this tab).
- Drag and drop an orange Switch block after the last sound block

- Read the ColorName variable and display it for 3 seconds along with text on the EV3 brick display:
- Drag and drop a red Variable block outside of the Loop block
- Set its mode to Read | Text
- Drag and drop a red Text block next to the variable block
- Type the text “The color is: ” into the A input
- Wire the read Variable block into the B input
- Drag and drop a green Display block next to the Text block
- Set its mode to Text | Grid
- Set Aa (text size) to 0
- Change the text from text to Wired
- Wire the result from the Text block into the Display block
- Drag and drop an orange Wait block next to the Display block
- Set its seconds input to 3
- Drag and drop a red Variable block outside of the Loop block
Hit the download and play button to test your program. An image of the full program is below (click the image to see it full size):

EV3 Text Block Example Program 2: Random Number Guessing Game
For the next example program we’ll make a guessing game using a random number block and the EV3 Brick Buttons to input the guess. If you are new to both these blocks we have a detailed post on the Random block here and a detailed post on the Brick Buttons here.
When the EV3 Brick buttons are pressed they output a numeric value, these values are are outlined below:
- Left
- Center
- Right
- Up
- Down
Program Logic:
- Generate a random number and save it to a variable named “RandomNumber”
- Prompt and the user to press a EV3 Brick Button for their guess and wait for a button push
- Save the guess into a new variable named “GuessNumber”
- Display the random number and guess number as well as an incorrect / correct message on the display
Let’s get started:
- Generate a random number and save it to a variable:
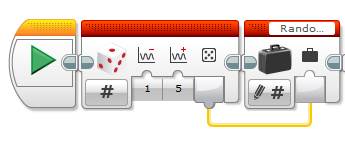
- Drag and drop a red Random block next to the start button
- Set the lower bound to 1
- Set the upper bound to 5
- Drag and drop a red variable block next to the random block
- Set its mode to Write | Numeric
- Click Add Variable and give it the name RandomNumber
- Wire the random number block into the Value input
- Drag and drop a red Random block next to the start button

- Prompt the user to pick a number, wait for a EV3 Brick button to be pressed and save the button value into a variable:
- Drag and drop a green Display block next to the variable block
- Set its mode to Text | Grid
- Set Aa (text size) to 1
- Set Text to Pick a Number:
- Drag and drop an orange Wait block next to the display block
- Set its mode to Brick Buttons | Change | Brick Buttons
- Drag and drop a red Variable block
- Set its mode to Write | Numeric
- Click Add Variable and give it the name GuessNumber
- Drag and drop a green Display block next to the variable block

- Display the random number, guess number and results (correct / incorrect) to EV3 screen.
- Display the Random Number:
- Drag and drop a red Variable block
- Set its mode to Read| Numeric
- Set the variable name to RandomNumber
- Drag and drop a red Text block next to the variable block
- Set the A input to “The Random Number: “
- Wire the variable block into the B input
- Drag and drop a green Display block next to the text block
- Set its mode to Text | Grid
- Set Aa (text size) to 1
- Set the text name to Wired
- Wire the output from the Text block into the Text input
- Drag and drop a red Variable block
- Display the Guess Number:
- Drag and drop a red Variable block next to the display block
- Set its mode to Read| Numeric
- Set the variable name to GuessNumber
- Drag and drop a red Text block next to the variable block
- Set the A input to “The Guess Number: “
- Wire the variable block into the B input
- Drag and drop a green Display block next to the text block
- Set its mode to Text | Grid
- Set Clear Screen to False
- Set Aa (text size) to 1
- Set Y to 4
- Set the text name to Wired
- Wire the output from the Text block into the Text input
- Drag and drop a red Variable block next to the display block
- Display the result (correct or incorrect):
- Drag and drop a red Logic block next to the display block
- Wire the read RandomNumber variable block into input a
- Wire the read GuessNumber variable block into input b
- Drag and drop an orange Switch block next to the logic block
- Set its mode to Logic
- Wire the output from the logic block into the Value input
- Drag and drop a green Display block into the True case within the Switch block
- Set its mode to Text | Grid
- Set Clear Text to False
- Set Y to 6
- Set the Text to “Correct“
- Drag and drop a green Display block into the False case within the Switch block
- Set its mode to Text | Grid
- Set Clear Text to False
- Set Y to 6
- Set the Text to “Incorrect“
- Drag and drop an orange Wait block next to the Switch block
- Set its time input to 5
- Drag and drop a red Logic block next to the display block
- Display the Random Number:
The image below shows the whole program, click the image to enlarge:

Hit to download and play to test your program – see how many games you can win.
Challenge: to enhance the program a little more, try adding a prompt to the user giving them the brick button numeric values.
We hope you enjoyed this deep dive post into the Lego MINDSTORMS EV3 Text programming block. Feel free to leave a comment if you have any questions or have a suggestion for a future post.

